PROTECTED SOURCE SCRIPT
Trap Zone Lite – Shinobi Lab
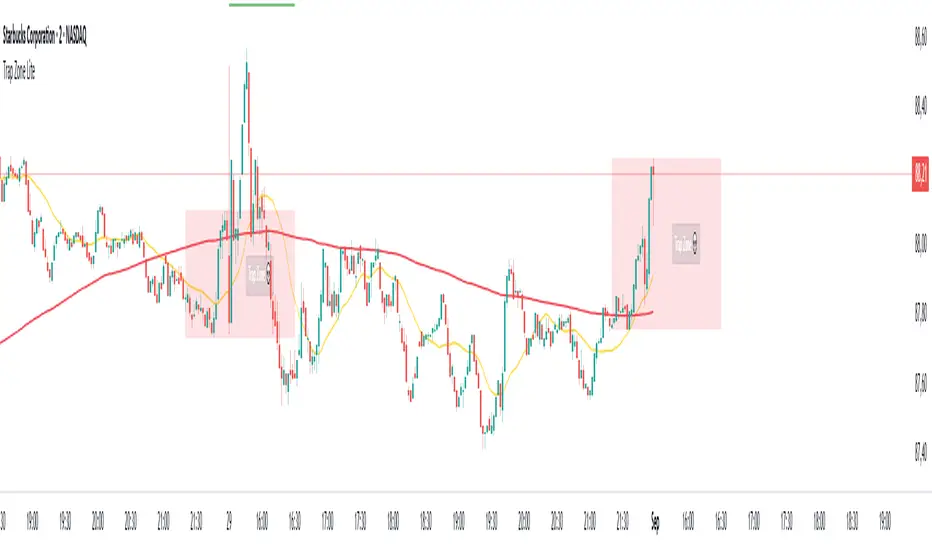
This indicator is designed for day traders, especially on lower timeframes such as the 2-minute chart. It highlights the Trap Zone: an area of congestion created by the 20-period moving average, the 200-period moving average, and the previous day’s closing price. This zone often acts as a heavy area of support or resistance where price can stall or trap participants.
What it shows:
A shaded Trap Zone box (congestion zone).
Two boundary lines that extend outward from the zone:
Zone + (above the trap) → context for bullish confirmation. A long signal forming here has stronger reliability.
Zone – (below the trap) → context for bearish confirmation. A short signal forming here has stronger reliability.
How to use:
The Trap Zone is meant as context, not signals. Traders should avoid taking setups inside the zone due to congestion. The value comes from using the boundaries:
Avoid shorting in Zone + (too much overhead resistance from prior day close + MAs).
Avoid longing in Zone – (too much downward pressure).
Focus on confirmations that occur outside the trap zone for higher-quality setups.
보호된 스크립트입니다
이 스크립트는 비공개 소스로 게시됩니다. 하지만 이를 자유롭게 제한 없이 사용할 수 있습니다 – 자세한 내용은 여기에서 확인하세요.
Shinobi Trading Lab – Indicators • Stats • Discipline
👉 Patreon: patreon.com/ShinobiTradingLab
👉 Patreon: patreon.com/ShinobiTradingLab
면책사항
해당 정보와 게시물은 금융, 투자, 트레이딩 또는 기타 유형의 조언이나 권장 사항으로 간주되지 않으며, 트레이딩뷰에서 제공하거나 보증하는 것이 아닙니다. 자세한 내용은 이용 약관을 참조하세요.