PROTECTED SOURCE SCRIPT
업데이트됨 Top & Bottom Strategy by The Accumulation Zone
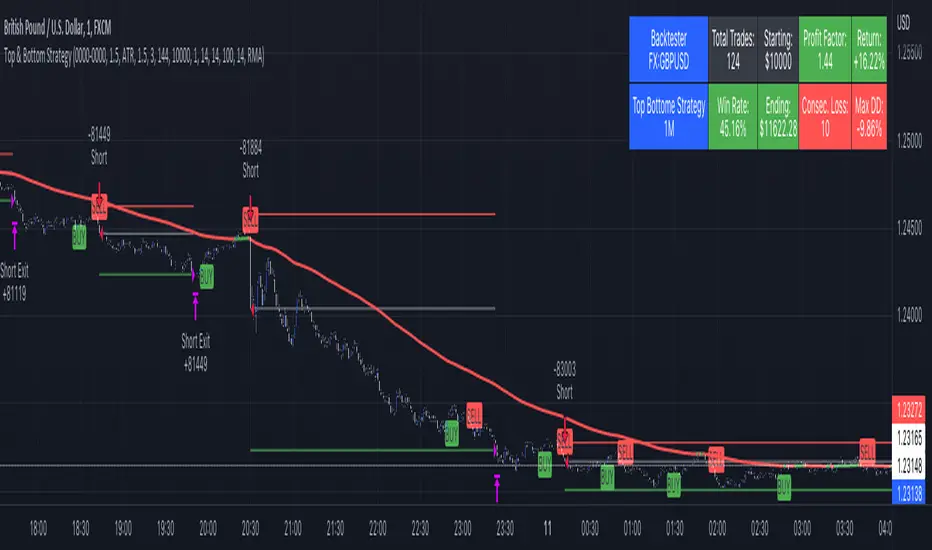
Hey Guy's welcome back to another Strategy based on a popular Indicator!
Indicators used in this Strategy:
-> Top and Bottom by ceyhun (Basic Settings)
-> Volatility Oscillator by verifid (Basic Settings)
Long Entry Criteria:
1. New Buy Signal from the Top & Bottom Indicator
2. Bullish Spike to the upside on the Volatility Oscillator ( above the BB Bands)
3. Enter Long (SL based on ATR, RR 1.5)
Short Entry Criteria:
1. New Sell Signal from the Top & Bottom Indicator
2. Bearish Spike to the downside on the Volatility Oscillator ( below the BB Bands)
3. Enter Short (SL based on ATR, RR 1.5)
Optional Filters:
- Session Filter
- Date Filter
- EMA Filter
IMPORTANT use this only for testing purpose. Don't Risk any Money. For educational Purpose Only!
릴리즈 노트
Update to Version 2.0릴리즈 노트
Automation Alert Message Update보호된 스크립트입니다
이 스크립트는 비공개 소스로 게시됩니다. 하지만 이를 자유롭게 제한 없이 사용할 수 있습니다 – 자세한 내용은 여기에서 확인하세요.
면책사항
해당 정보와 게시물은 금융, 투자, 트레이딩 또는 기타 유형의 조언이나 권장 사항으로 간주되지 않으며, 트레이딩뷰에서 제공하거나 보증하는 것이 아닙니다. 자세한 내용은 이용 약관을 참조하세요.
면책사항
해당 정보와 게시물은 금융, 투자, 트레이딩 또는 기타 유형의 조언이나 권장 사항으로 간주되지 않으며, 트레이딩뷰에서 제공하거나 보증하는 것이 아닙니다. 자세한 내용은 이용 약관을 참조하세요.