Timeframe: 2H
Pair: GBPJPY
📊 Analysis:
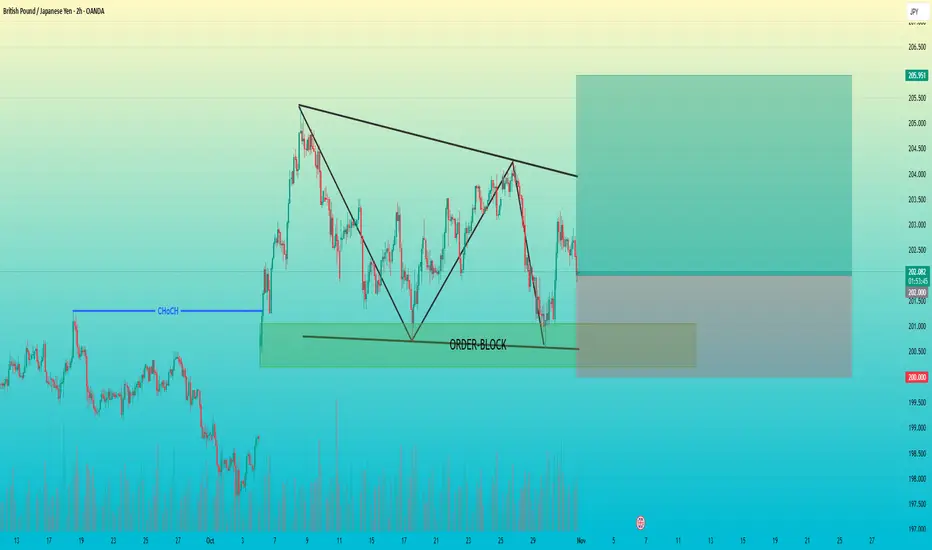
The market recently showed a CHoCH (Change of Character), indicating a potential shift from bearish to bullish structure.
A clean bullish Order Block has formed near the previous demand zone, aligning with structure support.
Price is currently retracing toward the Order Block zone, offering a potential buy setup for continuation.
📈 Trade Plan:
Entry Zone: CMP or safe entry Inside Order Block area
Stop Loss: Below the OB low (around 200.00)
Target: 206.00
Risk to Reward: Approx. 1 : 2
⚠️ Notes:
Maintain proper risk management.
Setup remains valid until price breaks below the Order Block zone.
Pair: GBPJPY
📊 Analysis:
The market recently showed a CHoCH (Change of Character), indicating a potential shift from bearish to bullish structure.
A clean bullish Order Block has formed near the previous demand zone, aligning with structure support.
Price is currently retracing toward the Order Block zone, offering a potential buy setup for continuation.
📈 Trade Plan:
Entry Zone: CMP or safe entry Inside Order Block area
Stop Loss: Below the OB low (around 200.00)
Target: 206.00
Risk to Reward: Approx. 1 : 2
⚠️ Notes:
Maintain proper risk management.
Setup remains valid until price breaks below the Order Block zone.
액티브 트레이드
거래청산: 스탑 닿음
For more live trades
join t.me/vedindicator
The reason behind Orderblock (Free Trial)
Visit- vedindicator.com
join t.me/vedindicator
The reason behind Orderblock (Free Trial)
Visit- vedindicator.com
면책사항
해당 정보와 게시물은 금융, 투자, 트레이딩 또는 기타 유형의 조언이나 권장 사항으로 간주되지 않으며, 트레이딩뷰에서 제공하거나 보증하는 것이 아닙니다. 자세한 내용은 이용 약관을 참조하세요.