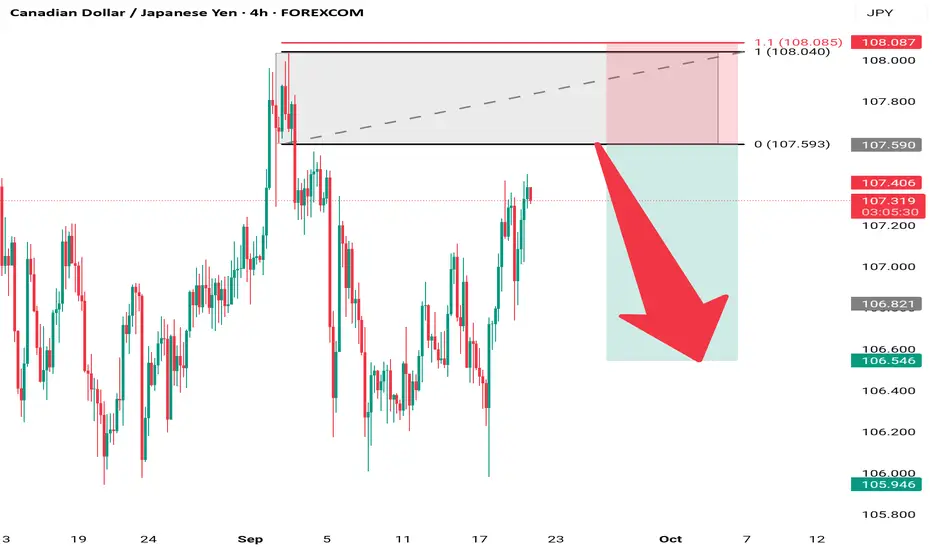
Entry Zone (Supply Area):
Around 107.59 – 108.08 (highlighted grey box).
Price is expected to react bearish from this resistance zone.
Stop Loss:
Just above 108.08 (top of the supply zone).
This protects against a breakout continuation.
Target Zone:
Around 106.00 – 105.95 (lower green box).
This is the projected support area.
📉 Trade Idea
Bias: Bearish (short).
The red arrow suggests that price may reject from the supply zone and head lower.
Risk-to-reward (RRR) looks favorable, roughly 1:2.
🧠 Technical Rationale
1. Supply Zone Rejection:
Price is retesting a prior resistance zone where sellers have stepped in before.
2. Trend Structure:
On the 4H chart, CAD/JPY is in a corrective rally after a bearish move — this could be a retracement before continuation down.
3. Candlestick Behavior:
If bearish rejection candles (e.g., wicks, engulfing) form near 107.80 – 108.00, it strengthens the short bias.
액티브 트레이드
거래청산: 타겟 닿음
final target of 1:2 hit.Trader 📈 | Analyst 🧠FX | Indices. Strategy + Patience = Profit.
면책사항
이 정보와 게시물은 TradingView에서 제공하거나 보증하는 금융, 투자, 거래 또는 기타 유형의 조언이나 권고 사항을 의미하거나 구성하지 않습니다. 자세한 내용은 이용 약관을 참고하세요.
Trader 📈 | Analyst 🧠FX | Indices. Strategy + Patience = Profit.
면책사항
이 정보와 게시물은 TradingView에서 제공하거나 보증하는 금융, 투자, 거래 또는 기타 유형의 조언이나 권고 사항을 의미하거나 구성하지 않습니다. 자세한 내용은 이용 약관을 참고하세요.